

#30 Tower Bridge

View of Tower Bridge showing the rings for the 2012 Olympics in London, England.
My last post was in 2010 and obviously a great many things have happened since then. Of relevance to this blog are the fact I still have my original Canon 5D (it’s been sitting unused for some time, poor thing) and I’ve been using the Sony NEX 5 for so long I’ve forgotten just how good the 5D is.
Tonight I got chatting to a friend who just purchased a new tripod and while I don’t recall the exact conversation, I find myself searching for tips on how to take a photo of Tower Bridge. Turns out there’s a ‘hidden’ viewing terrace from which one can get great views.
And with that I head out to find it! It’s strange how instinctive packing a camera bag has become: I pack a tripod, 2 batteries, spare memory cards and even some gradient ND filters…no idea if they will be useful at night 🙂
I wait till it’s dark enough and hope the strong winds don’t cause too much camera shake for long exposures. I take a few shots. A security guard shows up out of nowhere and asks if I’m a tourist. I say yes and he goes away. I take some more shots. Then I pack up and go home feeling pleased that I still know how to operate the 5D.
(Oh and the Grad ND filters did come in handy – I used one to stop the bright lights of the bridge from blowing out…at least I think it helped. It’s late. Time for bed).
ND Grad filters or HDR?
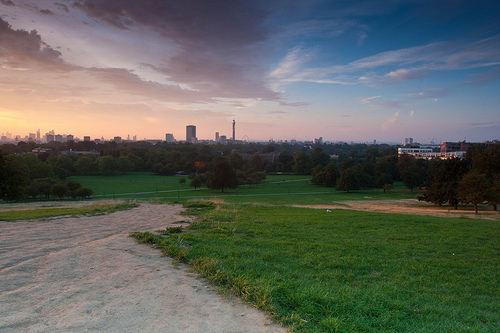
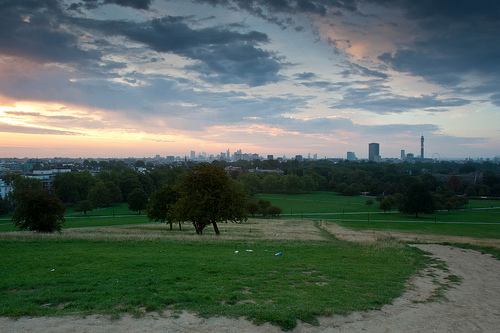
I’ve often wondered how people capture dramatic skylines because every time I tried either the ground was too dark or the sky was too light (and often over exposed). The camera just can’t capture the full range of light levels needed to get a good shot that includes both the sky and the ground (it has limited dynamic range).
Clearly it can be done…but how? I decided to research it and here are my first results:
Turns out there are two ways: HDR and ND Grad filters.
HDR – or High Dynamic Range – involves capturing multiple shots…one that works for the bright sky, one for the relatively darker ground and one for the mid-range that doesn’t really work for either. Afterwards, the multiple shots are combined on the computer with HDR software. This has to be done for every shot. You don’t need any new equipment (except for maybe a tripod if you don’t already have one). Some of the HDR software is also free.
ND Grad – or Neutral Density Gradient – filters are pieces of glass or plastic resin that have a dark bit at the top and gradually become completely clear towards the bottom. You place them in front of the lens at the time you take the shot and it cuts down the amount of light coming from the bright sky at the top of the frame. Good quality filters – ones that don’t colour the image artificially – are expensive. There’s a well known brand called Lee and some of their filters can go for close to £100 each.
I really don’t like to sit in front of a computer combining multiple images so I decided to take the plunge and invest in some Neutral Density Gradient filters. Unfortunately, no one seems to have Lee in stock (due to supply problems). So I got some other highly rated ones from a company called HiTech. The ones I got measure 100mm x 150mm and fit into a standard Lee filter holder (luckily a few places did have those in stock).
It’s like a whole new world for me now and I’ll definitely be taking these filters on my trip to Bhutan next week.
The day I realised I’ve stopped chimping
Chimping: The act of checking the small display on the back of your camera after every shot.
As I wrote in a previous blog entry, I went to photograph the Tweedrun. At this event, there was a lot going on and a lot to see. The conditions were splendid – warm sunny day and plenty of light. I enjoyed looking at the outfits and bikes.
I guess this is how photographers did it in years gone past… I trusted that the camera was going to do what I asked of it and knew what results would come out.
Granted, the conditions were great. Nevertheless, it was a nice warm feeling: I had pre-set the ISO to 200. I could hear the shutter speed was good. I was comfortable with the framing and I trusted the results my equipment would give me. I took some shots and enjoyed the day. The camera was an extension of me.
Isn’t that what it’s all about?
Footnote: I have no problem whatsoever with anyone (including myself) chimping. In fact I fully encourage it because it helps to learn what your camera is doing. Why make it harder than it already is? For example, in certain extreme lighting situations I can see myself checking the rear screen once or twice – I just won’t be doing it after every shot.